Monday, November 29, 2010

Pear Stuffed Chicken, Broccoli Salad and Mashed Butternut Squash

This chicken dish is one of my husband's favorites, particularly because of the cream sauce that goes along with it. I tried to balance out the rich chicken with the broccoli and butternut squash. These all go well together, or make them separately as part of your own dinner menu! 


It may look complicated, but was actually really easy to pull together with frozen broccoli, pre-cooked bacon and frozen butternut squash.


Pear Stuffed Chicken
2 skinless, boneless chicken breasts
2 slices provolone cheese, halved
1 Bosc pear, thinly sliced
1 shallot, sliced
2 tablespoons milk
1/4 cup Panko bread crumbs
2 egg yolks
1/4 cup white sugar
1/4 cup white cooking wine
1/4 teaspoon vanilla extract
  
Preheat oven to 375 deg F. Lightly oil a baking pan lined with aluminum foil.
  
Using a sharp knife, cut a large pocket in each chicken breast. (Hint: Cutting close to the smooth side of the breast ensures no holes in the chicken.) Place 1 half-slice of provolone inside each chicken, followed by half of the pear slices, and a small amount of shallot. Pull each chicken breast back together, top with the remaining half slice of provolone, sprinkle with a small amount of milk, and coat with panko. Place stuffed breasts on baking pan.
  
Bake for 30 - 35 minutes, or until no longer pink, and juices run clear.
  
While the chicken bakes, make the sauce. In a small pot over low heat combine the egg yolks and sugar. Beat until the yolk lightens and froth forms. Slowly add the wine, stirring constantly, until the sauce thickens. Remove from the heat and stir in the vanilla. (you can use a double boiler if you are worried about burning the sauce)

**Tip: you really can use any type of pear you can find, or even substitute apples (I would use Granny Smith in that case); although it may be tempting to use regular bread crumbs if you do not have panko, really the dish is so much better with the panko. 

Broccoli Salad
4 slices bacon (I use pre-cooked, see tip below)
1 8-10 oz bag frozen broccoli (or use fresh if you are so inclined)
1/2 cup sharp Cheddar cheese, shredded
1/4 cup red wine vinegar
1/8 cup white sugar
salt and pepper to taste
2/3 cup mayonnaise

Place frozen broccoli in a medium pot of water and bring to a boil over medium-high heat. Prepare an ice water "bath" while the broccoli cooks to stop the cooking process and cool the broccoli down. Just as the water had begun to boil (remember frozen broccoli is already cooked), scoop out the broccoli and transfer to the ice water. (if you decide to use fresh broccoli, cook as you normally would, but still use the ice water bath to cool it down quickly)

Crisp the bacon and crumble (if you use fresh bacon, cook it until crisp in a skillet and crumble)

In a large bowl, combine broccoli, cheese, and bacon.

Prepare the dressing in a small bowl by whisking together the red wine vinegar, sugar, salt and pepper to taste, and mayonnaise. Combine dressing with salad. Cover, and refrigerate until ready to serve.

**Tip: our local Whole Foods has a daily breakfast bar that has cooked bacon; they charge $4.99/pound. Once every week or two, I pick up about 10 slices (which costs MUCH less than buying a package of bacon and cooking it myself because I'm not paying for the fat that will render out anyway, plus it's more convenient for cooking in general to have pre-cooked bacon on hand), and freeze the bacon as soon as I get home. Whenever I want to use bacon, as in this recipe or even to sprinkle on a salad, I just pull out a few slices and crisp them in the toaster oven. If you don't have a Whole Foods, maybe other grocery stores or even buffet type restaurants will have this option...it really is a money and time saver!

Mashed Butternut Squash
3 cups cooked butternut squash (I cook several at a time, cube them and freeze them)
1-2 T butter
1/3 c milk

Place the squash in a medium pot over medium heat (if using frozen, it will take a bit longer to thaw out first, then continue with directions). Once the squash is heated through, add the butter and turn up the heat a bit, mashing the squash as you go (think mashed potatoes technique here). Use an immersion blender to make a smoother mash (the consistency will still be pretty thick). Add the milk a few tablespoons at a time and continue to use the immersion blender until you reach desired consistency. 

Sunday, November 28, 2010

Hummus & Pita Points and Curried Chicken Salad

I LOVE hummus. It is so easy to make, it's healthy, and it's tasty. A perfect after church light lunch is hummus with pita points and some good old chicken salad. Today I decided to make curried chicken salad to accompany my delicious hummus!

Hummus
1 can chick peas, rinsed and drained
2-3 garlic cloves, minced
1/4 cup water
Tahini, to drizzle
Olive oil, to drizzle


Combine chick peas, garlic and water in a food processor and process until smooth; add more or less water for the texture you prefer


Drizzle prepared tahini and a bit of olive oil over the hummus and top with dried parsley, or fresh green onions would be good too. If you want to make your own tahini, as I did, place 4 tablespoons of sesame paste in a food processor with 2 1/2 oz water and process until smooth and creamy. 

Pita Points
2 whole wheat pitas
olive oil, to drizzle
kosher salt, to season


Cut each pita into 8 slices, like a pizza, then separate the 2 layers of pita to make 32 pita points. Drizzle with olive oil and salt and place in a single layer on a baking sheet and bake 10-12 minutes on 400 deg F, or until lightly browned. Serve with hummus. 

Curried Chicken Salad
2 cooked chicken breasts (or any leftover cooked chicken); roughly chopped
1 apple (any kind will do); cored and diced
1/4 cup cashews (really any nut you like); chopped
1/4 cup dried cranberries
salt and pepper to taste
1 T curry (just the plain, yellow curry, nothing spicy)
1/3- 1/2 cup mayonnaise (depending on your preference for creaminess)


Combine all ingredients well in a bowl. Adjust the salt, pepper, curry and/or mayo to your liking. Serve on multigrain bread. 

Friday, November 26, 2010

Wild Cherry Cheesecake

As I mentioned in my Thanksgiving post, we were invited to a Thanksgiving dinner with friends today, Friday. Our contribution was a goat cheese roll (not pictured!) and a cheesecake with cherries. The food and fellowship were great, we have a lot to be thankful for ... including cheesecake!


Wild Cherry Cheesecake
2 cups ground gingersnap cookies
6 T butter, melted
2 8-oz bars cream cheese, softened
1 cup sugar, divided
1 egg
2 cups sour cream
1 tsp vanilla, divided
1/2 - 1 cup wild cherry preserves

Combine the ground gingersnaps and melted butter in a bowl; press evenly into a 9" spring form pan, going about an inch up the sides. Preheat the oven to 350 deg F.

Using a stand mixer, or a hand mixer, beat the cream cheese and 3/4 cup of the sugar until smooth; beat in the egg then 1/2 cup of the sour cream and 1/2 tsp of the vanilla. 

Pour the mixture into the crust and bake 40-45 minutes just until set. Meanwhile, whisk together the remaining sour cream, sugar and vanilla. Spread evenly over the hot cheesecake when it is finished baking and return to the oven for another 5-8 minutes, until set. 

Cool in the pan, then refrigerate for 3 hours (I was running short on time, so I threw it in the freezer for about an hour and a half and it was perfect!)

To serve, run a knife around the edges of the pan before un-molding.  Spread the cherries over the top before serving (**tip: I buy wild cherries when they are in season in the summer and freeze them in zip-top bags with a few tablespoons of sugar; all you have to do is place them in a pot over low heat and simmer until they turn into preserves, or any other kind of topping you like: pancakes, waffles, bread, etc...add a few more tablespoons of sugar to make the mixture more syrupy)

If you're not a fan of gingersnaps, you can use 2 cups of ground graham crackers, or even chocolate graham crackers. 

Thursday, November 25, 2010

Corn Chowder

We took my son to the Macy's Thanksgiving Day parade this morning, his first. We all had an amazing time, even though it was quite chilly out. What is the perfect remedy for a cold morning spent watching oversized balloons hover over the best city in the world? Home made corn chowder, of course. I make this frequently in the cold months, but I never make it the same. I just use whatever ingredients I have on hand. For example, I usually added shredded chicken to the pot, but I didn't have any, so this ended up meatless, but still hearty and delicious!

Why, you might be wondering, am I making corn chowder on Thanksgiving Day? True, it is an unorthodox meal on this traditional turkey day, but we don't have family in the City and have been invited to a Thanksgiving dinner tomorow at a friend's, so today is just us hanging around the apartment...eating chowder!

Corn Chowder
1 medium onion, diced
2 stalks celery, chopped
3 carrots, peeled and chopped
2-3 garlic cloves, minced
2 T butter
2 T all purpose flour
4 cups chicken broth
salt and pepper to taste
1 can white beans
2 cans corn
2 T cornstarch
3/4 c milk, divided


In a large dutch oven over medium-high heat, melt the butter and saute the onion, celery, carrots and garlic, about 5 minutes. Add flour and whisk to combine; cook 1-2 minutes to get the flour taste out. Slowly add the chicken broth, constantly whisking to dissolve all clumps. Season with salt and pepper. Reduce heat to low.


Drain the can of white beans and one can of corn, run under water in a colander and drain. Add to chowder mixture and stir. Drain and rinse the other can of corn. In a food processor, add the corn, cornstarch and 2-4 tablespoons of milk; pulse until creamy (you are essentially making creamed corn here). Add the creamed corn and the remaining milk to the chowder mixture and stir. Simmer on low another 10-20 minutes until thick and bubbly. 


Serve with shredded cheddar cheese and  a dollop of sour cream.


Another variation would be to add red potato or even sweet potato chunks to the chowder, which I have done before in the past.  Simply petite dice the potato and add right after the chicken broth so it has enough time to get tender. 

Monday, November 22, 2010

Chinese Five Spice Chicken

We don't eat out often, and rarely order take out either, clearly I wouldn't have a food blog if I didn't cook enough to populate it, but recently I have been craving Chinese: sesame chicken...I love this dish, I know it is horribly unhealthy and I probably do not want to know what is in it, but in the world of take out it is one of my faves. 

Let me save you the trouble of searching for a good sesame chicken recipe online. Truly, it does not exist (if you have found otherwise, please enlighten me!). I spent an inordinate amount of time looking for a restaurant-style Chinese sesame chicken recipe, to no avail. Determined not to completely give up and attempt to satiate my sesame chicken craving, I found a couple of recipes online, tinkered with them a bit and came up with what I am now calling Chinese Five Spice Chicken. Turns out it tasted really good, just not like sesame chicken. If I were to make it again, I think I would make the sauce differently, as noted...

Chinese Five Spice Chicken
4, 4-oz. boneless, skinless chicken breasts, cut into strips
2 T soy sauce
2 T pure maple syrup
2 T cooking sherry
1 tsp fresh ginger root, grated
1 tsp Chinese five spice powder
1/3 cup all purpose flour
salt and pepper to season
sesame oil
sesame sauce (recipe follows)
2 cups cooked rice (I used wild rice, but any rice could be used with this dish)

Combine the first six ingredients in a large zip top plastic bag, mix well and marinate in the refrigerator for 20 minutes. Meanwhile, in another large zip top plastic bag, add the flour and season with salt and pepper. Make the sesame sauce while the chicken marinates as well (see below).

Once the chicken is marinated, transfer each piece from the marinating bag to the flour bag, shaking any excess liquid off. Discard marinating bag. Toss chicken pieces in the flour until well coated. Heat a skillet over medium-high heat and just cover the bottom in sesame oil. Add the breaded chicken pieces one by one, shaking off excess flour (I used tongs). Pan fry, turning each piece once, until both sides are crispy and the chicken is cooked through.

Reduce the heat to low, add the sesame sauce and toss to coat and heat through. Serve over rice.

Sesame Sauce (how I made it)      Sesame Sauce (how I would change it)
1 cup sugar                                        3/4 c sugar
1/4 cup cornstarch                             3 T cornstarch
1 1/2 c water                                      1 1/2 c water (plus more to thin out)
1/8 c rice wine vinegar                        1/8 c rice wine vinegar
3 T soy sauce                                     3 T soy sauce
1 tsp sesame oil                                1 tsp sesame oil
1 garlic clove, minced                        1 garlic clove, minced

In a sauce pan, whisk together the sugar and cornstarch until well combined. Turn the heat to medium and add the remaining ingredients, whisking well to combine. Bring to a boil, then reduce heat to low and simmer five minutes. If the sauce is too thick, thin it with a few teaspoons of water at a time and whisk. Remove from heat and set aside until ready to toss with chicken. (this will probably make more sauce than is needed to cover the chicken, so add as much or as little as you want to your cooked chicken and reserve the rest for another time). 

Another note, if you do not have Chinese five spice powder, you can make it. I actually had run out, so I made some for this dish. I'm afraid I didn't measure the exact amounts of each spice that goes into it, I just put all of them in a spice grinder and kept smelling and adding until I achieved an acceptable form. This is roughly what goes into five spice powder:

Chinese Five Spice Powder
4 full pieces star anise
2 tsp fennel seeds
1 tsp ground ginger
2 tsp cinnamon
2 tsp ground cloves

Grind well in a spice grinder (which for me is an old coffee bean grinder that I re-purposed for spices). Play with the amounts to your personal taste! Freshly made spices always taste better than the bottled concoction, so you can hardly go wrong. Just remember that star anise is pretty potent, so go easy on that one to start. 

Friday, November 19, 2010

Ghostcook

I was feeling run down this evening after a long week, so while I orchestrated what would end up on our dinner plates tonight, my ghostcook actually executed the entire meal...thank goodness I married a renaissance man! As long as my husband has some directions, he can make just about anything in the kitchen, from tacos to truffles. Tonight I had planned on lamb burgers with tzatziki sauce and sweet potato fries. Burger and fries of any variety is the perfect Friday night meal (even this healthy version)!

Lamb Burgers
1 lb. ground lamb
salt and pepper to taste
whole wheat rolls (I actually buy whole wheat pizza dough and divide into 8 rolls and bake; they're like whole wheat ciabatta bread!)
tzatziki sauce (recipe follows)

If you already have the rolls ready, cut them in half and toast lightly; otherwise bake the rolls first before starting the burgers (I usually make the rolls in advance and freeze them once they're baked, then pull out the number I need for these burgers...or you can just use store bought rolls!)

Make the tzatziki sauce and set aside (see recipe below).

Season the lamb with salt and pepper and form into 4 even patties. Cook the burgers to medium-well (either by grill, or since I don't have a grill, or backyard for that matter, a cast iron skillet works just as well).

To assemble the burgers, simply dab some tzatziki sauce on the toasted buns and add the lamb burger.

Serve with sweet potato fries...how do you make those? Wash and scrub 2-3 sweet potatoes (I like to leave the skin on, but you can peel it if you like). Cut the potatoes into fries and toss in a bowl with 1 tablespoon of olive oil and a pinch of kosher salt. Spread in an even layer on a baking sheet and bake 20-30 minutes until tender.

Tzatziki Sauce
1/2 cup greek yogurt
2 garlic cloves, minced
2 tsp shallots, minced
drizzle of olive oil
drizzle of lemon juice
drizzle of apple cider vinegar
2 tsp dried dill (fresh would be good too, but I didn't have any)

Combine in a food processor and blend well. (this is not exactly a traditional Tzatziki sauce recipe (which, for one, includes cucumber), but it is what I had around the kitchen and tasted pretty close to us!)

The ghostcook did a fantastic job this evening, although feeling run down I had no trouble devouring my meal. Kudos to the hubs!

Thursday, November 18, 2010

Comfort Food

A friend of mine just had a baby and I had the privilege of bringing her family dinner yesterday. One of my favorite things to do is bring a meal to somebody, whether I know them or not. Yesterday was a particularly windy day, a perfect candidate for some comfort food. Plus, who wouldn't like comfort food after the birth experience??

I decided to make a Whole Wheat Penne Bolognese. A bolognese is a meat-based sauce for pasta, it is sometimes thought to be a tomato sauce, but authentic recipes use tomato concentrate. I am no where near Italian, so I took the liberty of using crushed tomatoes (for shame!) because I wanted, well, a saucier sauce...

Whole Wheat Penne Bolognese
2 tablespoons extra-virgin olive oil
1/4 lb bacon, finely chopped
1 medium onion, finely chopped
2 celery stalks, finely chopped
2 carrots, peeled finely chopped
5 garlic cloves, minced
2 tsp dried thyme (or 4 fresh thyme sprigs)
1 tsp dried rosemary (or 1 fresh rosemary sprig)
2 bay leaves
2 lbs. ground turkey (I chose a leaner version, but you could use ground beef, or 1 lb. of pork + 1 lb. of veal for a more authentic sauce)
1 cup whole milk
1 (28-ounce) can crushed tomatoes
2 cups dry red wine
Kosher salt and freshly ground black pepper
1 lb. whole wheat penne pasta


In a large dutch oven, heat the olive oil over medium heat. Add the bacon and saute for 2 minutes to render out the fat. Add onion, celery, carrots, and garlic; stirring to combine. Add in the thyme, rosemary, and bay leaves (if using fresh thyme and rosemary, strip the thyme and rosemary sprigs; discard stems). Cook for 5 to 10 minutes, stirring, until the vegetables are tender but not browned.

Raise the heat to medium-high and add the ground turkey; brown until the meat is no longer pink, breaking up the clumps with a spoon. Add the milk and simmer about 10 minutes. Pour in the tomatoes and wine; season with salt and pepper.

Bring the sauce to a boil, then lower the heat and cover. Slowly simmer for 2 hours, stirring occasionally, until the sauce is very thick. Taste again for salt and pepper. Remove bay leaves.

When you are ready to serve, bring a large pot of salted water to a boil, add the pasta and cook for 8 to 10 minutes or until tender yet firm. Drain pasta well and toss with the Bolognese sauce.

I served this meal with a mixed green salad and a crusty Italian loaf (I also brought some of the mini ginger cupcakes from yesterday's post!).


I went to drop the meal off just before 5pm, a short walk up from my apartment. I was able to visit with my friend for a short time, and of course see her sweet baby girl, who was so gorgeous by the way. 

Although I did not technically "break bread' with my friend and her family, I did return home to enjoy the same dinner I had prepared for my family. I love these days.

Wednesday, November 17, 2010

Mini Ginger Cupcakes

There is nothing like the bite of ginger to get you going in the morning...and who is it that said a girl can't have a cupcake for breakfast? Nobody (I dare you to say otherwise!). 

I am a member of a fabulous moms group here in New York that meets weekly on the UWS of Manhattan, and we alternate bringing in snacks for our morning get-togethers. This week was my group's week to bring the goods, so I decided to contribute these ginger cupcakes. Wait, don't be fooled! Full disclosure: They are not fully from scratch, I cheated.  As a mother to an 18-month old, sometimes I just don't have (uninterrupted) time in the kitchen. I took some tips from the Hello Cupcake book, and combined it with some ideas in the December issue of Real Simple. Voila, here is the recipe for these delicious little (breakfast! if you want) treats:

Mini Ginger Cupcakes
1 18.25 oz box of white cake mix (gasp!)
1/2 cup milk
1/3 cup canola oil
1/2 cup molasses
4 eggs
2 tsp ground ginger
1 tsp cinnamon 
1/2 tsp ground nutmeg
Cream cheese icing (I used canned as a time saver, but you could make your own as well)
Candied ginger, for garnish

Preheat oven to 350 deg F. Grease 2 mini muffin pans. (you can also use mini cupcake wrappers)

Combine the cake mix and spices well in a stand mixer, then add the milk, oil, molasses and eggs and mix until well blended. (this process can easily be done with a hand mixer as well)

Spoon 1 tablespoon of batter into each of the 12 mini cupcake molds and bake 10 minutes, or until toothpick inserted comes out clean. The batter makes about 6 dozen minis, so you'll need to continue to take the cooked muffins out of the pan and place on a cooling rack, cool the pan under tap water, dry and re-fill with batter.

Once the minis are completely cool, fill a piping bag with the icing and use whichever tip you'd like to place a small dollop of icing on the top of each cupcake.  I used a star tip on half and no tip (essentially a large circle) for the other half. Finely chop the candied ginger and sprinkle on top for garnish. 

Tuesday, November 16, 2010

Cornmeal Breaded Tilapia


I admit, I am not the best at preparing fish. I find it quite the fastidious little protein that often gets itself permanently crossed off my list. But every now and then, I soften to its temperament and I give it a fair shot at the dinner table...besides it's supposed to be good for you. I'm all for good health. Tonight's concoction was Cornmeal Breaded Tilapia with tartar sauce, onion rings, and steamed broccoli. 

Cornmeal Breaded Tilapia
4 Tilapia fillets (I buy them frozen and thaw them)
1/2 cup flour
1 egg, + water
1/2 cup cornmeal
1 T everything rub (see recipe below)
1 small yellow onion
Canola oil (for frying)
Tartar sauce for dipping (recipe follows)

Set out 3 shallow dishes/containers and pour the flour in the first one, beat the egg with a few drops of water and add it to the second one, and pour the cornmeal and everything rub in the third one and mix well. Your three dishes should line up to your pan for frying.

Heat a heavy skillet over medium-high heat. Pour just enough canola oil to cover the bottom (no deep frying here!)

Dredge each fillet in the flour first, shake off excess, then dip in the egg wash, and then dredge in the cornmeal mixture. Lay fillet gently down into the oil away from you (to prevent oil splashing and burning!). Flip once browned on one side, brown on the other side and remove. Drain on a plate lined with a paper towel. Repeat with remaining fillets.

Peel the onion and slice into large rings; separate to make individual onion rings. Follow the same procedure with the onion rings for dredging and frying. Drain on a separate plate lined with a paper towel.

Serve with tartar sauce for dipping and a side of steamed broccoli.

Everything Rub (I made this up as a spice that can literally go on everything)
2 tsp kosher salt
2 tsp garlic powder
1 tsp cumin
1 tsp paprika (smoked paprika even better)
1 tsp dried oregano
1 tsp onion powder
1 tsp black pepper
1 tsp sugar
1/2 tsp cinnamon
1/2 tsp ground mustard
1/2 tsp chili powder
1/4 tsp ground cloves

Combine all spices well and store in an airtight spice container (I know, it's a lot of spices, but it makes a pretty good size batch to keep handy)

Tartar Sauce
1/2 cup mayonnaise
1 T lemon juice
1 tsp sugar
2-3 dill pickles, diced
1 T onion

Puree all ingredients in a food processor. (sometimes I drain a few teaspoons of the pickle juice from the jar into the mix for a little kick)

Sunday, November 14, 2010

Thai Something Soup?

I realize as I am trying to write tonight's recipe that I have no idea what I made. Years ago I found a recipe for Thai Cashew Chicken that I have re-made a dozen different ways since then. 

The basic recipe is the same, but the quantities and exact method differ. So. For all intents and purposes, this is, I guess, Thai Cashew Chicken Soup. 

The finished dish ended up tasting similar to Massaman Curry, sans curry (if that makes any sense). My husband's favorite Thai dish is Massaman Curry, so his contentment with tonight's creation was the only seal of approval I needed. Now, on to the goods!

Thai Cashew Chicken Soup
1-2 T sesame oil; divided
1 medium onion, thinly sliced into semi-circles
2 cloves garlic, minced
3-4 T brown sugar
1/2 tsp chinese five-spice powder
1 tsp ground ginger
1/4 cup creamy peanut butter
1 can coconut milk (low-fat version will work too); save can
1 medium sweet potato
3-4 boneless, skinless chicken breasts
2 cups rice, prepared 
Roasted, salted cashews, for garnish

Prepare rice according to package directions. I use wild rice for the nutritional value, but jasmine or basmati rice would be delicious with this dish. 

Heat a large enameled cast iron dutch oven over medium-low heat; circle a few times with sesame oil and toss in onions, garlic and brown sugar. Stir constantly until sugar is melted (don't let it burn!). Add five-spice powder and ginger and stir well. Add peanut butter and incorporate. Add coconut milk and stir well. Using coconut milk can, fill with water and add to mixture. Stir well.

Clean and peel the sweet potato and cut it into a petite dice. Add to dutch oven and stir well. Reduce heat to low, cover and simmer stirring occasionally. 

Meantime, heat a skillet over medium-high heat, circle with sesame oil and sear chicken on both sides; make sure chicken is cooked through. Let chicken rest on cutting board for 5 minutes, then roughly chop and add to dutch oven. Continue to simmer until potatoes are still firm but tender (about 20 minutes). Scoop 1/3 - 1/2 cup of rice into the bottom of a soup bowl and smother with Thai Cashew Chicken. Top with cashews and serve. 

Although I served this dish solo tonight, some steamed edamame would have been an excellent addition!

Friday, November 12, 2010

Hawaiian Pizza Night

Friday nights are frequently pizza night...on the menu tonight: Hawaiian Pizza! Homemade marinara really makes a difference too; homemade pizza is really easy to pull together with mostly store-bought ingredients, but I always make my own marinara. It is definitely worth the time. The toppings for this pizza rendition are simple: Canadian bacon and frozen pineapple.  As I always say, I never make the same (even simple) recipe twice. Here's how it went down tonight:

Marinara Sauce (makes 2 pizzas worth)
1 medium onion, diced
2-3 cloves garlic, finely chopped
1 medium carrot, finely diced
2 celery stalks, finely diced
3 T extra virgin live oil
1 (28-oz) can crushed tomatoes
kosher salt and pepper to taste
2 tsp dried thyme

Heat olive oil over medium heat in a heavy skillet and sautee the onion, garlic, carrot and celery just until translucent (do not brown); usually 10-15 minutes. Add the crushed tomatoes, salt and pepper, and thyme.  Simmer, covered, over low heat 30-60 minutes until thick (the longer the better). Using an immersion blender, puree the sauce to desired consistency (a food processor or blender would work too). Freeze unused portion for another time.

Hawaiian Pizza
1 pkg pizza dough (I use whole wheat)
1-2 T olive oil (or olive oil spray)
1-2 tsp garlic powder
1-2 tsp dried oregano
Marinara (see above)
Frozen pineapple chunks
6 slices Canadian bacon, diced
1 8-oz bag of shredded mozzarella cheese

Roll out pizza dough. Brush with olive oil and season evenly with garlic powder and oregano.

Heat a skillet sprayed with cooking spray over medium heat and toss frozen pineapple chunks until thawed and slightly seared; set aside. 

Spoon desired amount of marinara onto prepared dough, top with pineapple, bacon pieces and cheese.

Bake at 350 deg F for 20 minutes, or until cheese is melted and crust is done. Let cool 5 minutes before serving.

*Tips: I buy a few bags of shredded mozzarella when they go on sale and keep them in the freezer for pizza. The frozen cheese can be broken up and spread right onto the pizza without thawing first. The pineapple and Canadian bacon quantities can be altered to suit your preference.

Unfortunately I do not have a photo to accompany this recipe, although rest assured it was delicious...my husband and son, and well me too, were so hungry we nearly ate the pizza right out of the oven! Next time I make this pizza, I will be sure to take a picture first.

Coming in with a FLOP

As the first post on this newly created blog, be warned that today's cooking adventure is all about the flop. I have a friend who asked me to take a look at a zucchini bread recipe and try to "fix it". Admittedly, I am not an expert chef, but I do possess enough knowledge generally to give a helping hand. So. First I decided to make the zucchini bread exactly as the recipe called for:

3 eggs beaten
1 1/2 cups sugar
1 cup vegetable oil
2 tsp vanilla 
3 cups grated zucchini
2 cups flour (1 cup white, 1 cup wheat)
1/4 tsp baking powder
1 tsp salt
2 tsp baking soda
2 tsp cinnamon

Mix eggs, sugar, oli, and vanilla. Add zucchini. Add dry ingredients.  Pour into 2 greased loaf pans and bake 325 for approx 50-60 mins.

My knee jerk reaction was that the baking soda to baking powder ratio was off, and there were too many eggs/oil for the amount of flour. I was thinking this bread is going to be heavy, not rise and taste like baking soda. It did...

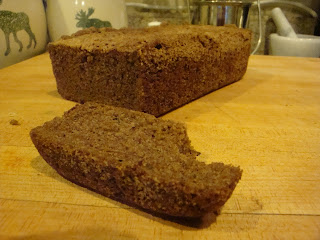
Exhibit A:  F.L.O.P.

Now what? I added a cup of flour for some stability, increased the sugar slightly to account for the extra flour, decreased the soda and salt, but increased the powder simply because I used whole wheat flour and thought it could use a little oomph. Here is what I came up with:


The Fix??
3 eggs beaten
2 cups sugar (added to account for extra flour)
1 cup canola oil
1 tsp vanilla (reduced, sometimes excess vanilla causes baked goods to fall)
2 cups grated zucchini (reduced; zucchini adds acidity to the mix)
3 cups flour (2 cup white, 1 cup wheat) (added 1 cup of white flour for stability)
1 tsp baking soda (reduced)
1/2 tsp salt (reduced)
2 tsp baking powder (increased)
2 tsp cinnamon

The result? Hmmm, well. Not really zucchini bread, but at least edible (unlike its predecessor). The color was light and the top had a pound cake'esque top. I made both a loaf and mini muffins from the batter. Time to bring in my "taster" (enter the hubs; he sampled a muffin). 

"They taste like cookies...like a muffin with a cookie top...Cookie Top Muffins!". Okay, so maybe I didn't fix the zucchini bread recipe, but I apparently created cookie top muffins. 


As a consolation prize, please enjoy MY zucchini bread recipe which I have made numerous times and just love! 

Zucchini Bread

3 cups all-purpose flour (Or 1 c whole wheat and 2 c all-purpose)
1 3/4 cups sugar (or 1 1/2 c packed brown sugar)
1 teaspoon baking soda
1/2 teaspoon salt
1 teaspoon ground cinnamon
½ teaspoon ground ginger
1/8 teaspoon ground cloves
1 teaspoon baking powder (2 t if using ww flour)
3 eggs, beaten
1/2 cup canola oil
1/2 cup sour cream or plain yogurt
1 teaspoon vanilla extract
2 cups shredded zucchini
1/2 cup chopped pecans (optional)


In a large bowl, combine the first eight ingredients. In another bowl, beat the eggs, oil, sour cream/plain yogurt and vanilla. Stir into dry ingredients just until moistened. Fold in zucchini and nuts.

Transfer to two greased loaf pans. Bake at 350 deg F for 60-65 minutes or until a toothpick inserted near the center comes out clean. Cool for 15 minutes before removing from pans to cool completely on wire racks.